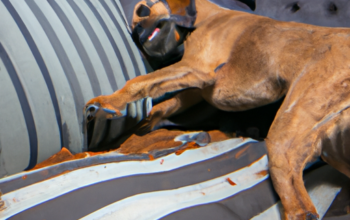
As a caregiver, your role in maintaining your dog’s health goes beyond providing food and shelter. One crucial aspect of pet care that often goes unnoticed is ear care. In this guide, we’ll walk you through the process of flushing your dog’s ears to help prevent ear infections and promote overall ear health.
Why is Flushing Your Dog’s Ear Important?
Just like humans, dogs can also experience ear problems. These can range from mild irritations to severe infections that can potentially lead to hearing loss. Regular ear flushing can help prevent these issues by keeping your dog’s ears clean and healthy.
- Prevention of Ear Infections: Ear infections are quite common in dogs, especially in breeds with long, droopy ears. Regular ear cleaning can help prevent the buildup of bacteria and yeast that can lead to infections.
- Removal of Dirt and Debris: Dogs love to play outdoors, which often leads to dirt and debris getting stuck in their ears. Flushing the ears helps remove these impurities, reducing the risk of irritation and infection.
- Early Detection of Issues: Regular ear cleaning gives you a chance to inspect your dog’s ears closely. This can help you spot signs of potential issues early on, allowing for timely veterinary intervention.
What You’ll Need for the Process
Before you start, make sure you have all the necessary supplies at hand. Here’s a list of what you’ll need:
- Dog Ear Cleaning Solution
- Cotton Balls or Gauze
- Tweezers
- Towel
- Treats (Optional)
| Item | Purpose |
|---|---|
| Dog Ear Cleaning Solution | To flush and clean the ear |
| Cotton Balls or Gauze | To wipe off excess solution |
| Tweezers | To remove any large debris |
| Towel | To clean up any mess |
| Treats | To reward your dog for their patience |
Steps to Flush Your Dog’s Ear
Flushing a dog’s ear can seem daunting, but with a little patience and care, it can be a relatively straightforward process. Here’s a step-by-step guide to help you:
- Secure Your Dog: Start by getting your dog into a comfortable and secure position. This will often depend on the size of your dog. Smaller dogs can be placed on a table or counter, while larger dogs can sit or lie down on the floor.
- Inspect the Ear: Check the dog’s ear for any visible signs of infection or irritation, such as redness, swelling, or unusual discharge. If you notice any of these, it’s best to consult a vet before proceeding further.
- Apply the Solution: Hold the bottle of ear cleaning solution above your dog’s ear and gently squeeze it to apply the solution. Be sure to follow the instructions on the bottle for how much to use.
- Massage the Ear: Gently massage the base of your dog’s ear for about 30 seconds. This will help the solution reach deeper into the ear canal and dislodge any debris.
- Wipe Away Excess Solution: Using a cotton ball or gauze, gently wipe away the excess solution and any dislodged debris from the ear.
- Reward Your Dog: Once you’re done, reward your dog with a treat and lots of praise for their patience and cooperation.
FAQs
Q: How often should I flush my dog’s ear?
A: The frequency of ear flushing depends on your dog’s breed, lifestyle, and overall ear health. In general, it’s recommended to clean your dog’s ears once a week.
Q: Can I use human ear cleaning solutions for my dog?
A: No, human ear cleaning solutions may contain ingredients that are harmful to dogs. Always use a solution specifically designed for dogs.
Q: What if my dog resists ear cleaning?
A: If your dog seems uncomfortable or resistant, it’s best to consult a professional groomer or vet. Forced ear cleaning can lead to stress and potential injury.
Remember, ear care is an important part of your dog’s overall health maintenance. Regular ear flushing can go a long way in keeping your furry friend healthy and happy.