Unleashing the power of your pencil has never been more delightful, as you’re about to embark on an endearing journey: sketching a heart-meltingly cute puppy. You’ll be astonished at how simple lines and shapes coalesce into something so charming.
It may seem like a daunting task, but fear not! With these step-by-step instructions, you’ll find it’s not only achievable but also immensely enjoyable. Whether you are honing your artistic skills or simply want to create a thoughtful gift for someone special, this guide will arm you with all the necessary techniques.
We’ll start by gathering art supplies and outlining the basic shape before adding detailed facial features that breathe life into our little pup.
Next, we’ll sketch out the body and finally add colors to our creation, turning it into a vibrant work of art.
Get ready to let your creativity flow as we dive headfirst into drawing an irresistibly cute puppy together!
Preparing Your Art Supplies
Before we dive into sketching our adorable pup, let’s make sure we’ve got all our art supplies on hand – you don’t want to be hunting for that elusive pencil mid-drawing!
Start by assembling your pencils, ensuring you have at least a 2H for lighter lines and a 6B for those lovely deep shadows.
You’ll also need an eraser; opt for a kneaded one as it’s fantastic at lifting graphite without damaging the paper.
Grab your sketchpad too – cartridge paper is ideal due to its smooth finish.
Don’t forget your sharpener, as maintaining a sharp point is crucial to accurate detailing.
Lastly, consider having some cotton buds or blending stumps ready to add texture and depth.
All set? Let’s serve up some joy with this cute puppy drawing adventure!
Outlining the Basic Shape
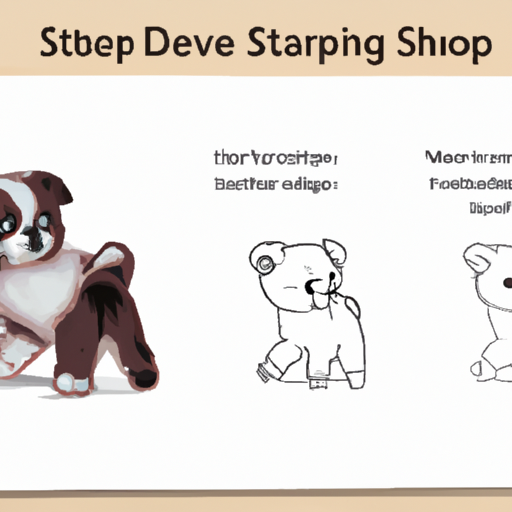
Initiating your artistic endeavor, you’ll want to sketch out the fundamental structure of your charming little canine. To begin, try visualizing a couple of overlapping circles for the head and body. The head should be slightly smaller than the body circle. For the legs, think about tall and narrow ovals positioned at the bottom of the body circle.
| Head Circle | Body Circle | Legs Oval |
|---|---|---|
| Slightly smaller than body circle | Larger than head circle | Tall and narrow |
| Positioned above body circle | Overlaps with head circle at top edge | Attached to bottom edge of body circle |
| Forms base for face details later | Provides structure for torso | Will form framework for paws |
Remember that these initial shapes are not final but merely guidelines. It’s okay if they aren’t perfect; you’re laying down groundwork for your cute puppy masterpiece!
Adding Details to the Face
Once you’ve set the foundation with basic shapes, it’s time to breathe life into your sketch by adding those distinctive facial features that’ll truly capture the spirit of a playful pup.
Start by defining the eyes – they’re the windows to your puppy’s soul after all. Draw two almond shapes on either side of the face and fill them in with sparkle for a lively look.
Next, sculpt an adorable button nose at the bottom center of your puppy’s face; remember, it should be a small inverted triangle. From there, design its mouth below the nose—two curved lines will do as our cutie is smiling!
Then bring attention to the ears, whether they’re floppy or perky depends on the breed but generally, they fall around the top corners of the head.
Last but not least, etch in whisker dots on either side of its snout for realism.
Now you’ve awakened an incredibly cute puppy on paper!
Sketching the Body
Shifting your focus to the body, remember that around 25% of a dog’s total length is its torso, so proportion is key when sketching. Begin by drawing a rounded rectangle for the chest area and another slightly larger one for the hip area. Make sure these shapes are connected with two curved lines representing the puppy’s back and belly.
Here are three things you can do to make your sketch more realistic:
-
Add volume: Knowing that puppies have chubby bodies, add softness to your drawing using gentle curves rather than rigid straight lines.
-
Sketch legs: Draw four small oval shapes for the feet, attaching them with slim cylinders representing the puppy’s legs.
-
Detailing: Add some fluffiness by using short jagged lines around the neck and hips areas.
Remember, patience and practice will help you master this adorable art form!
Finalizing and Coloring Your Canine Art
After you’ve perfected the sketch, it’s time to bring your canine creation to life with color and final touches. Start by grabbing colored pencils or markers for coloring.
| Step | Details |
|---|---|
| 1 | Erase any stray marks or lines that you don’t need in your finalized artwork. |
| 2 | Use a light brown pencil for the puppy’s fur, keeping strokes short and soft to mimic real fur texture. |
| 3 | Darken certain areas like ears and tail with a darker brown shade for depth and dimension. |
| 4 | Color the eyes using black but leave small white spots for reflections, creating an adorable sparkle in its gaze. |
| 5 | Lastly, add pink blushes on cheeks and inside ears to give your puppy a healthy glow. |
Don’t rush this process; take time to serve your artistry with patience and dedication.
Frequently Asked Questions
What are some tips for drawing a puppy for beginners?
Start by sketching a basic shape, like a circle for the head and oval for the body. Add simple lines for legs and tail. Draw the eyes, nose, and mouth with gentle curves to create cuteness. Practice makes perfect!
Are there different techniques to draw different breeds of puppies?
Absolutely! Different breeds require distinct techniques. For a fluffy Pomeranian, you’ll emphasize texture; for a Dalmatian, focus on spots. Studying each breed’s unique features will help you master their portrayals in your drawings.
How can I add more emotions to the puppy I am drawing?
To convey emotion in your puppy drawing, focus on the eyes and ears. For joy, draw the eyes wide and ears perked up. If you’re aiming for sadness, droop the ears down and narrow the eyes slightly.
Can I use digital tools for drawing a cute puppy?
Absolutely, you can. Like a sculptor chiseling away at marble, you’ll chip out your cute puppy using digital tools. Start by sketching with light strokes, add colors subtly and details meticulously to breathe life into it.
What are some common mistakes to avoid when drawing a cute puppy?
Avoid exaggerating the puppy’s proportions, which can make it look less realistic. Don’t rush shading; subtlety is key for fur texture. Beware of over-complicating eyes and noses; simplicity often captures cuteness best.
Conclusion
Well, there you have it! With a few simple strokes and some creative shading, you’ve turned a blank canvas into an adorable puppy sketch. But wait, what’s that? Your pup looks a bit plain? Well, don’t fret – we’re not quite done yet.
Stay tuned for our next exciting lesson where we’ll dive into adding colors and texture to bring your cute little canine to life!


