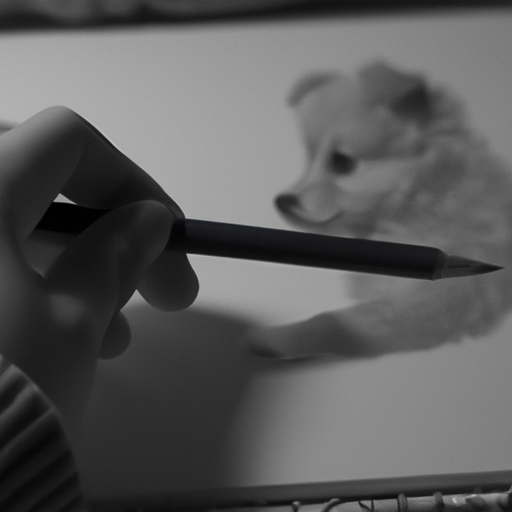
Imagine having the power to immortalize your adorable, playful pet puppy on paper. Now picture yourself able to do that with just a few strokes of a pencil or brush. That’s right! You don’t need to be a seasoned artist to achieve this feat. All you need is a little guidance and loads of enthusiasm.
Welcome, dear reader, to our comprehensive guide on ‘how to draw a puppy’. This step-by-step tutorial will walk you through gathering the right art supplies, sketching out the basic outline, adding intricate details, all the way up to shading and coloring your sketch for that professional finish. By following these instructions carefully and practicing consistently, you’ll soon be creating captivating pieces of art featuring man’s best friend in no time!
So whether you want to create heartwarming gifts for loved ones or simply find another way to express your love for puppies – we’ve got you covered!
Gathering Your Art Supplies
Before you can bring your adorable puppy sketch to life, you’ll need to gather all your art supplies – so let’s make sure you’ve got everything ready!
First and foremost, get a quality drawing pad. The thicker the paper, the better it will hold up against erasing and shading.
Next in line are pencils; you’ll need an assortment of hardness levels from 2H for light outlining to 6B for deep shadows.
Don’t forget a good eraser for adjusting details and smudging tool for creating texture in your puppy’s fur. A sharpener is essential as well.
If you’re enthusiastic about colors, grab a set of colored pencils or watercolor paints.
Lastly, keep a source image or model handy – either pull up photos online or have your own pup pose!
Now that everything’s set, we’re ready to draw!
Sketching the Basic Outline
Let your pencil dance lightly across the page, tracing out the gentle curves and lines that will soon give life to a playful canine friend. Start with a basic oval for the body, slightly tilted to show movement. Then add another smaller oval above for the head.
You can use this simple table as a guide:
| Body Part | Shape |
|---|---|
| Body | Oval |
| Head | Oval |
| Ears | Triangles |
| Legs | Rectangles |
| Tail | Curved Line |
Once you have these basic shapes in place, begin adding details like fur texture, eyes, and a wagging tail. Remember not to press too hard on your pencil at first; keep your lines light until you’re satisfied with your sketch. Once done, you can start refining your adorable puppy drawing using more definitive strokes.
Adding Details to Your Sketch
As your sketch begins to take shape, it’s time to breathe life into your creation by adding the finer details. This process is akin to furnishing a house; you already have the structure, now it’s time for the decor!
Here are some key areas where you can add detail:
-
Eyes: These are windows to a puppy’s soul. Draw large round eyes and make them shine with just a dot of white. Add eyelashes for extra cuteness!
-
Fur: Puppies are fluffy creatures. Use short, quick strokes all over their body to give that fluffy look. Varying the pressure can create depth in fur texture.
-
Paws: Don’t forget these adorable features! Sketch small rounded shapes for paws and put tiny lines for toes.
Remember, as an artist serving others, your goal isn’t only creating visually pleasing art but also evoking emotions.
Shading and Coloring Your Puppy
Now that you’ve brought your little bundle of joy to life with those detailed strokes, it’s time to add some color and depth with shading. Begin softly applying your medium of choice- be it colored pencils, watercolors, or pastels. Remember, less is more when starting out. Layer the colors gradually for natural-looking fur and don’t forget to keep the light source in mind while shading.
Next, carefully apply darker shades on areas where shadows hit; typically these are under the ears, belly, and tail. Now comes the fun part – adding highlights! Use a lighter shade or even an eraser to create bright spots where light naturally hits – like on top of the head and back.
Finally, step back and admire your masterpiece! You’ve just added another layer of love to this adorable work-in-progress puppy drawing.
Finalizing Your Artwork
You’re nearly there! It’s time to add those finishing touches that’ll really make your artwork pop. Let’s finalize your puppy drawing with some polish and flair.
| Task | How-To |
|---|---|
| Add Highlights | Use a white colored pencil or an eraser to create highlights in the eyes, nose, and fur. This will give your puppy drawing a lifelike sparkle. |
| Incorporate Texture | Add depth by using different strokes for different parts of the fur. Long strokes for longer hair and short ones for shorter hair. |
| Touch up Details | Go back over your lines one more time to ensure they’re as clean and precise as you want them. |
Remember, practice makes perfect – keep refining your skills, and soon enough you’ll be creating masterpieces that serve joy and inspiration to others through the power of art!
Frequently Asked Questions
What are some popular puppy breeds to draw for beginners?
You’re sure to wow your friends by drawing the ‘big three’ of beginner-friendly breeds! Beagle, Cocker Spaniel, and Pug puppies are all the rage. With their simple shapes and expressive eyes, you’ll be an artist in no time!
Can I use digital software to draw a puppy? If so, which ones are recommended?
Absolutely, you can use digital software to draw a puppy. Software like Adobe Illustrator, Procreate, or SketchBook are user-friendly options. They offer various brushes that replicate real-life drawing tools for authentic sketches.
How can I make my puppy drawing look more realistic?
“Did you know 90% of artists improve with practice? To make your puppy sketch more realistic, focus on texture. Study photos, notice fur patterns, and use varied pencil strokes to mimic these details. Keep practicing!”
Are there any specific tips for drawing puppy fur?
Absolutely! To capture realistic puppy fur, start with light pencil lines to indicate direction and length. Then add darker strokes for depth. Use an eraser for highlights. Don’t forget, fur isn’t perfectly smooth or uniform.
How can I incorporate movement or emotions into my puppy drawing?
To express movement or emotions, observe real puppies. Note how their eyes sparkle when happy or tails droop when sad. Show movement with action lines and draw expressive eyes to convey emotion. Practice makes perfect!
Conclusion
You’ve done it! You’ve taken a simple sketch and transformed it into an adorable puppy, brimming with life. Remember how you started with just basic shapes and lines? Then, like magic, details and shading brought your creation to life.
If little Timmy down the street can do this at age 7, so can you! So keep practicing – who knows? Maybe next time, you’ll be teaching us how to draw a unicorn.


