As a caregiver, you understand the importance of providing the best care for your furry friend. Whether your dog has a minor injury or a significant wound, knowing how to bandage their ear effectively can be a lifesaver. This guide will take you through a step-by-step process, ensuring your dog is comfortable and safe throughout the procedure.
H2: Understanding Why Your Dog Might Need An Ear Bandage
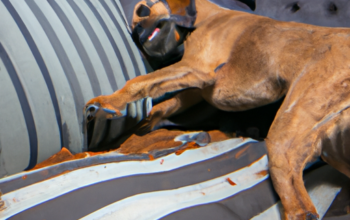
There are several reasons why your dog might need an ear bandage. These can range from minor scratches or bites, to more significant issues such as hematoma or surgical wounds. It’s important to understand the underlying issue before you proceed with bandaging, as some conditions might require professional veterinary care.
- Scratches or bites: These are common and typically minor injuries, often resulting from rough play or encounters with other animals.
- Hematoma: This is a collection of blood outside of the blood vessels, usually caused by trauma or injury. An ear hematoma in dogs can cause the ear flap to swell and might require veterinary attention.
- Surgical wounds: After surgery, your dog might require a bandage to protect the surgical site and prevent infection.
H2: Gathering Your Supplies
Before you start the bandaging process, you’ll need to gather a few essential supplies. Here’s a list of what you’ll need:
- A clean towel or cloth
- A pet-safe antiseptic
- Cotton balls or gauze
- Bandages – either self-adhesive or those that require clips
- A cone, or E-collar, to prevent your dog from scratching or biting at the bandage
H2: Bandaging Your Dog’s Ear – A Step-By-Step Guide
Once you’ve gathered your supplies, it’s time to start the bandaging process. Here’s a step-by-step guide to help you through it:
- Clean the affected area: Start by gently cleaning the wound or affected area with a pet-safe antiseptic. Use a cotton ball or gauze to apply the antiseptic, taking care not to cause further injury.
- Apply the bandage: Next, apply the bandage over the wound. Ensure it’s snug, but not too tight as to cut off circulation.
- Secure the bandage: If you’re using a self-adhesive bandage, it should stick to itself. If not, you’ll need to use clips to secure it in place.
- Prevent tampering: Finally, put the cone or E-collar on your dog to prevent them from tampering with the bandage.
H2: Monitoring and Aftercare
After bandaging the ear, it’s crucial to monitor the wound for signs of infection, such as redness, swelling, or foul smell. If you notice any of these signs, contact your vet immediately.
Also, remember to change the bandage regularly. Here’s a quick guide on how often you should change it:
| Type of Wound | Bandage Change Frequency |
|---|---|
| Minor wounds | Every 3-4 days |
| Major wounds or surgical sites | Daily or every other day |
H2: Frequently Asked Questions
Q: How long should I keep the bandage on my dog’s ear?
A: This depends on the severity of the wound. For minor wounds, a few days to a week should be enough. For major wounds or surgical sites, consult your vet.
Q: What if my dog won’t let me touch their ear?
A: If your dog is too distressed or aggressive, it might be safer to take them to a vet.
Q: Can I use human bandages on my dog?
A: It’s best to use pet-safe bandages as these are designed to be safe and non-toxic for pets.
Remember, while this guide provides a good starting point, always consult with a vet if you’re uncertain or if the wound seems severe. Your dog’s health and comfort should always be the top priority.